I have no idea why Microsoft decided to change the New Project dialog in Visual Studio 2019. The old New Project dialog worked just fine. I’m not aware of huge numbers of people requesting any changes. If you read the comments here, you’ll see that the change has not been universally welcomed: https://devblogs.microsoft.com/visualstudio/redesigning-the-new-project-dialog/
As far as I can seem the new version is far inferior to the old version. Put simply, it’s an unstructured, sprawling mess. Even so, I suppose we are going to have to learn to live with it (unless Microsoft sees the error of its ways and gives us back the old New Project dialog). So, here’s a quick guide to using it…
Create a New Project At Startup
If you want to create a new project as soon as you start Visual Studio 2019…
• Start Visual Studio.
• In the Startup screen, select Create A New Project
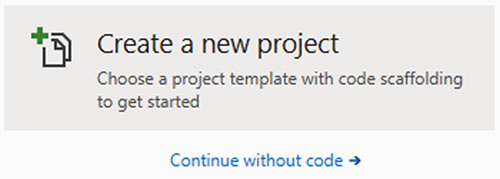
If you don’t want to create a new project at this stage, you can click ‘Continue without code’. You can start a new project later on as explained below.
Create a New C# Project From Within VS 2019
If you are programming C#: To start a new project from within Visual Studio…
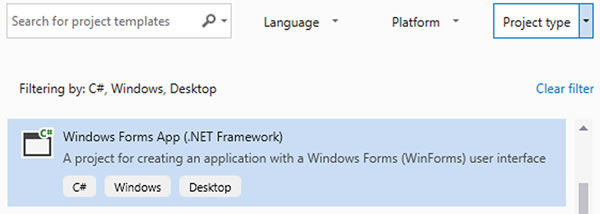
• Select File, New, Project
• From the Language dropdown list, select C#
• From the Platform dropdown list, select Windows
• From the Project Type dropdown list, select Desktop
• From the project list select Windows Forms App
• Click Next
• Name the project, and browse to a location on disk
• Click Create
Create a New C Project From Within VS 2019
If you are programming C: To start a new project from within Visual Studio…
• Select File, New, Project
• From the Language dropdown list, select C++
• From the Platform dropdown list, select Windows
• From the Project Type dropdown list, select Empty Project.
• Click Next
• Name the project, and browse to a location on disk
• Click Create
Visual Studio now creates a new project with separate folders for Header Files, Resource Files and Source Files.
• Right-click the Source Files folder.
• From the popup menu, select Add | New Item
• Select Code | C++ (.cpp) file.
• In the Name field, change the file name to: main.c
• Click Add.
Edit the contents of this source file to the following:
#include <stdio.h>

int main(){
  printf("Hello world\n");
  return 0;
}
Shortcut Project Creation
There is a slightly faster way to cut through the mess of this horrible new dialog. You can select a project type more quickly by using the search box on the Create New Project dialog. For example, with a C# Windows Forms project, you could search for Winforms. For a C project, you could search for C++:

Once you’ve created a new project, the procedures for adding and editing files, compiling and debugging are the same in Visual 2019 as in other versions of Visual Studio.